Creating an ACF Options Page
Advanced Custom Fields just never stops finding new ways to be cool. Or rather, I just can’t stop discovering new ways in which ACF is even cooler than I thought.
The most recent (accidental) discovery I’ve made is how to create a built-in options page for your site. This is incredibly convenient as the options page is “Universal” meaning you can call its fields from any page on the site without having to set up a custom loop.
This is in contrast to how I had previously created “Options Pages” which was to have an actual page titled Options (or Footer or whatever) that I would then reference with a custom query like so
<?php $custom_query = new WP_Query('pagename=footer');
while($custom_query->have_posts()) : $custom_query->the_post(); ?>
With an actual Options Page all of the field information is available globally so if you’re already in a loop, you have access to your options.
Pretty handy right? Let’s get it hooked up.
P.S. This lil’ beauty is only available if you have ACF Pro or the Options Page Add-on but really, you should have already purchased Pro by now because it’s wonderful and terrific and a bargain at twice the price.
Activating the Options Page
Turning on the Options… option is super simple. Just add the following lil’ bite of code to your functions.php file.
if( function_exists('acf_add_options_page') ) {
	acf_add_options_page();
}
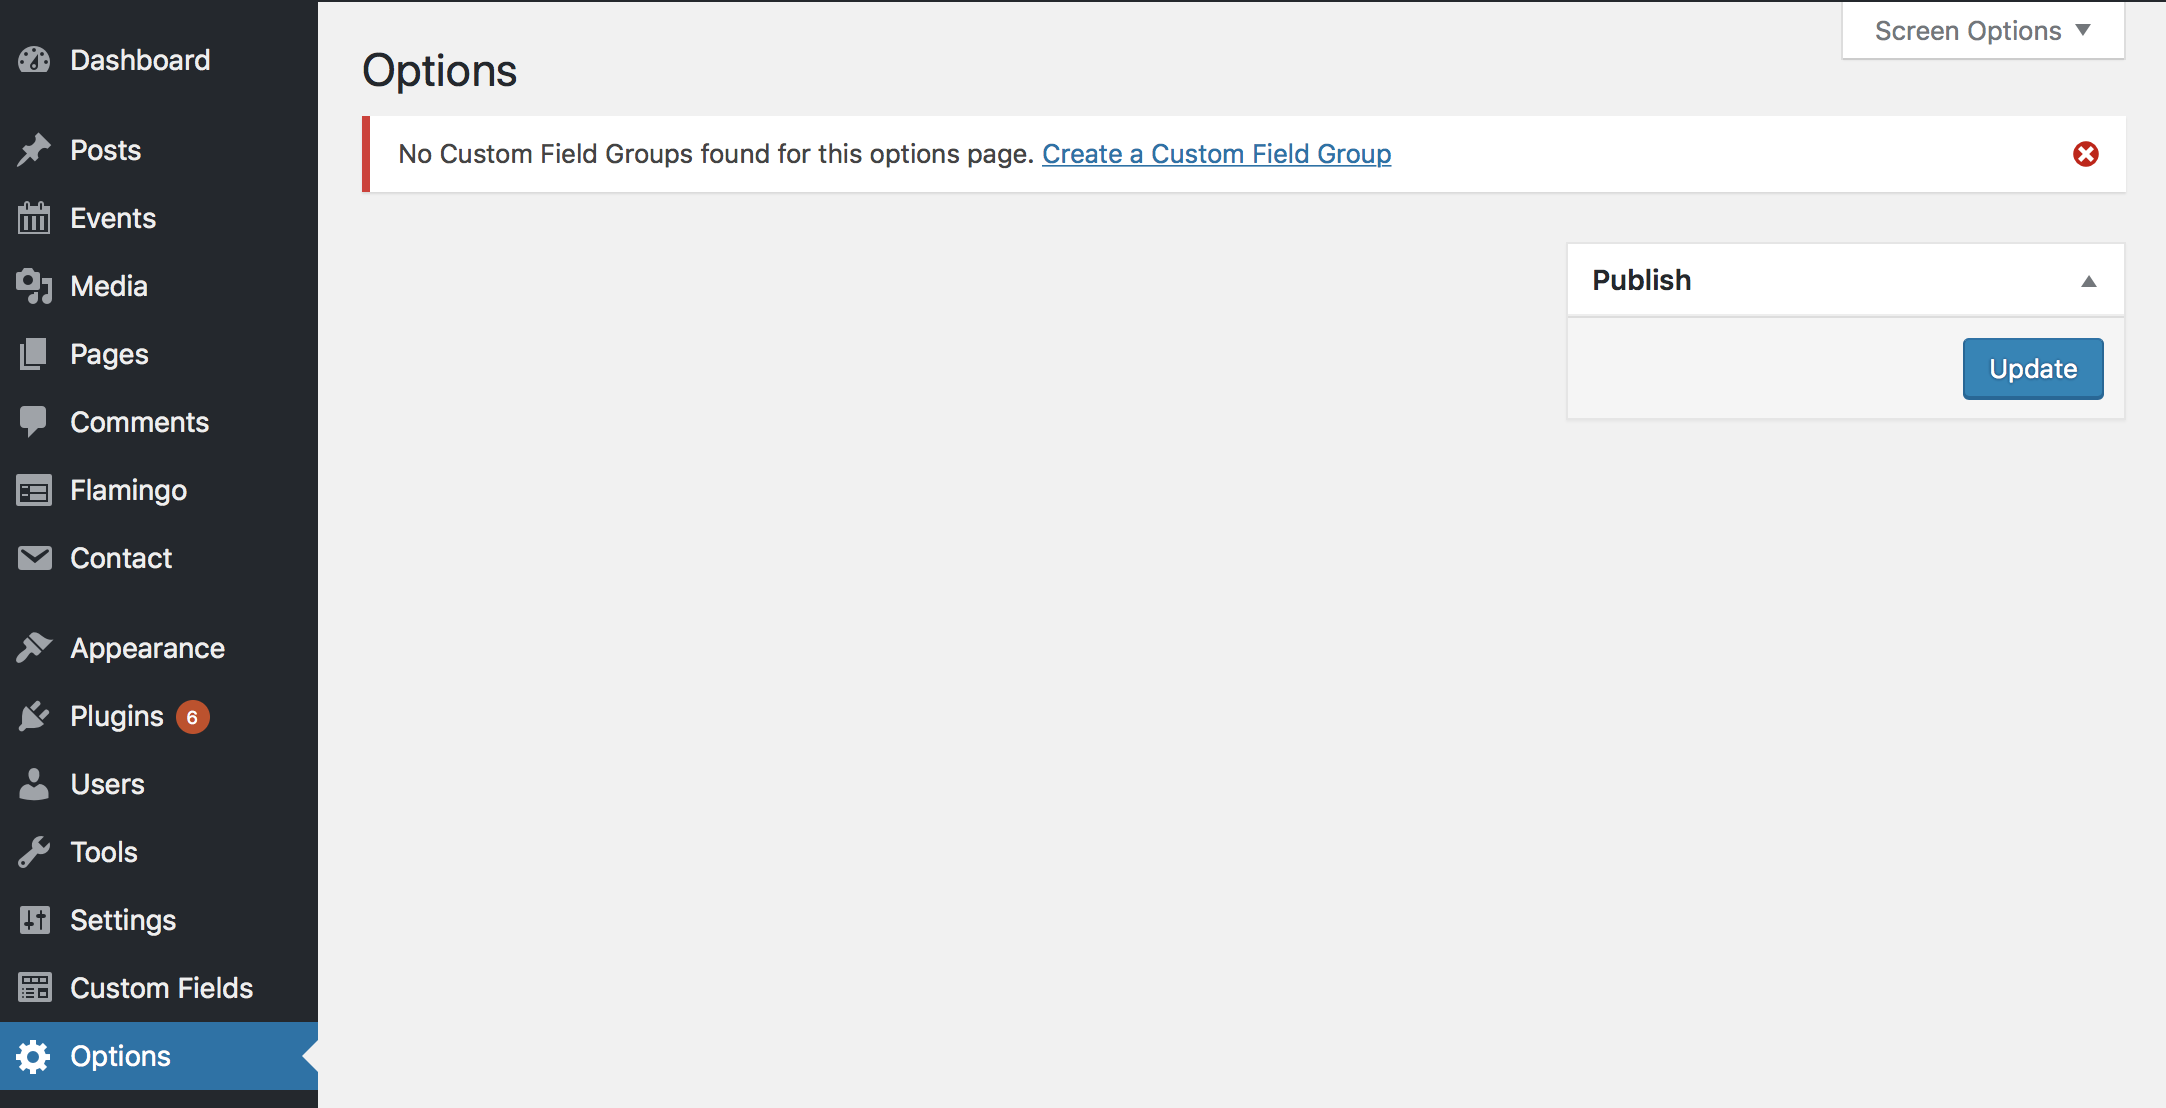
Once you save and reload you’ll see this in your admin.

Cool huh? No surprise that you don’t have any Field Groups yet since you likely haven’t assigned any. We’ll get to that in a second.
Next Level - Kick it Up a Notch
First though let’s add a little extra zazz to our Options page. Swap out that first line you put in your functions.php with this set up.
if( function_exists('acf_add_options_page') ) {

	acf_add_options_page(array(
		'page_title' 	=> 'Theme General Settings',
		'menu_title'	=> 'Theme Settings',
		'menu_slug' 	=> 'theme-general-settings',
		'capability'	=> 'edit_posts',
		'redirect'		=> false
	));

	acf_add_options_sub_page(array(
		'page_title' 	=> 'Theme Header Settings',
		'menu_title'	=> 'Header',
		'parent_slug'	=> 'theme-general-settings',
	));

	acf_add_options_sub_page(array(
		'page_title' 	=> 'Theme Footer Settings',
		'menu_title'	=> 'Footer',
		'parent_slug'	=> 'theme-general-settings',
	));

}
You can use this method to split your Options page into convenient sections like Header, Footer, etc. Super handy.
Put it to Work
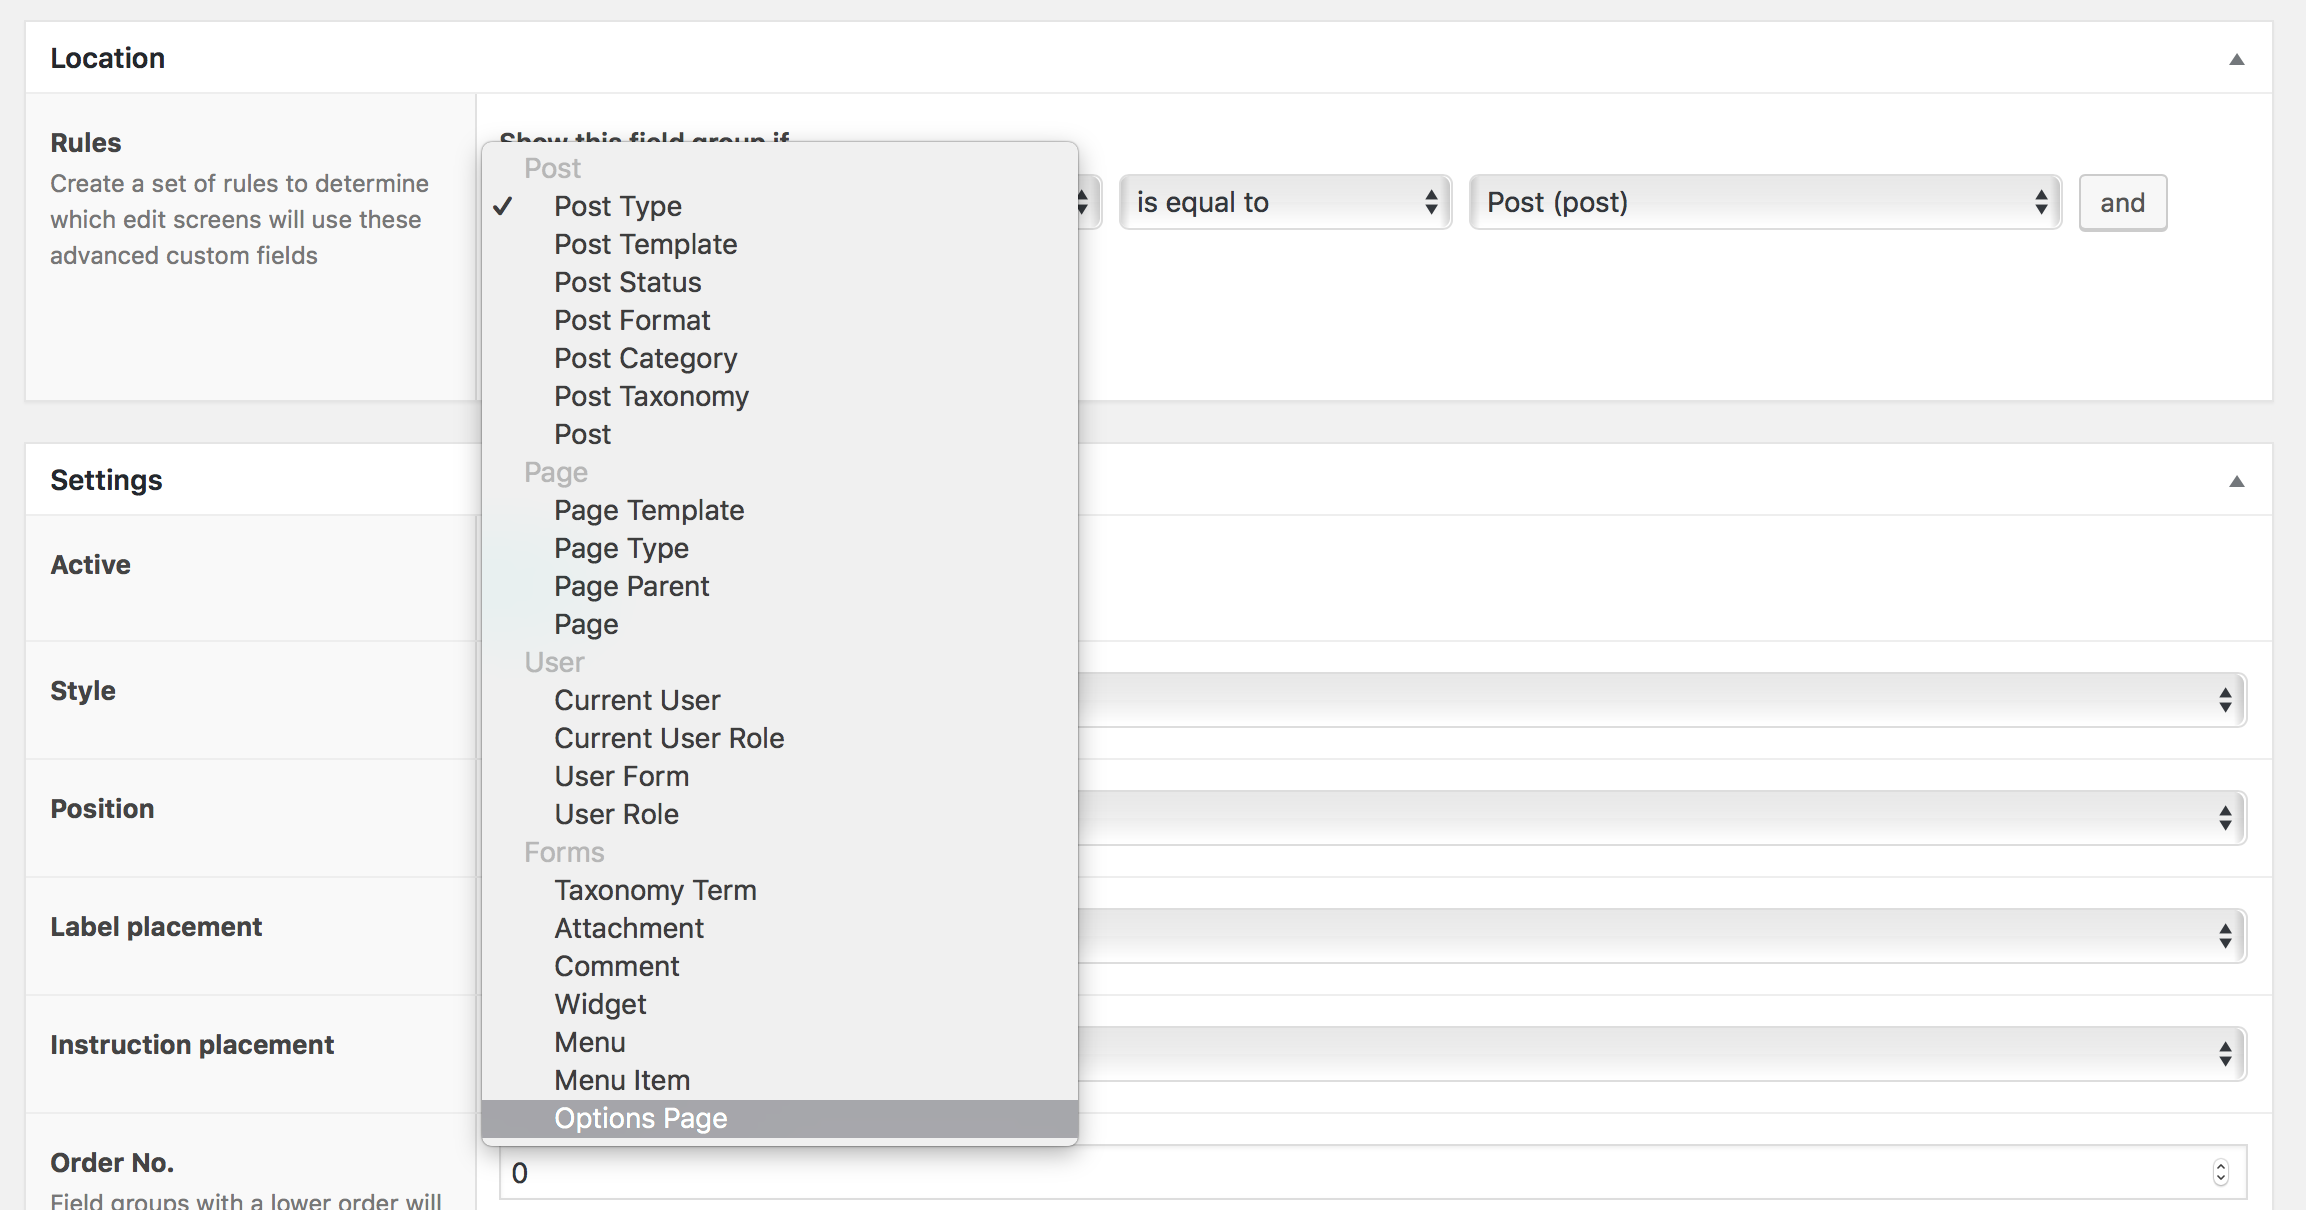
Once your Options page is set up you add fields to it by selecting “Options” from the location drop down on the “Add New Field Group” page. Just scroll to the bottom, choose “Options” and then (if you have split your options page into specific locations) choose which segment the field should live in (header, footer, etc).

Now that you have your field created and some info added it’s time to call it in your theme.
Remember, all of the fields you add to your Options page are available universally. This means any time you are inside of a generic loop…
<?php if (have_posts()) : while (have_posts()) : the_post(); ?>
//generic loop excitement
<?php endwhile; endif; ?>
You can call any of your option page fields just by adding the word option to your field like this.
<?php the_field('field_name','option'); ?>
The only other thing worth mentioning is that if you are using a repeater field you only have to include option on the intial repeater loop, not on the sub fields. So, like so.
<?php if( have_rows('repeater_field', 'option') ): while ( have_rows('repeater_field', 'option') ) : the_row(); ?>
	<?php the_sub_field('field_name');?>
<?php endwhile; endif; ?>
In Summation
Discovering options pages felt like leveling up. Having universally available fields is incredibly useful and I find new ways to incorporate them with every project. Give them a try the next time you have a chance, you’ll be glad you did!